Deploy a NestJS API with a Database Connection
A NestJS 12 API with validation and a PostgreSQL pool, deployed without a Dockerfile. Plus the one-line change that cut my cold start from 17 seconds to 5.



On this pageShowHide
To deploy a NestJS API with a database on Light Cloud, create a PostgreSQL database, read its address from DATABASE_URL, push the project to GitHub and click Deploy. Light Cloud detects NestJS, runs npm run build and starts the app on port 3000 with no Dockerfile. Change the starter's start script to node dist/main before you deploy: nest start compiles the project again on every cold start.
In my run that one change cut the time from instance start to ready from 17.2 seconds to 5.4.
What you will build
A NestJS 12 notes API backed by PostgreSQL on Light Cloud:
POST /notesstores a note, with the body checked by a validation pipe.GET /notesandGET /notes/:idread them back.GET /healthchecks the database too, so a wrongDATABASE_URLshows up at once.
Source code: github.com/light-cloud-com/tutorial-nestjs-api.
Before you start
- Node.js 22.22.3 or later, or 24.15 or later. The NestJS CLI 12 stops on older versions; I used Node.js 24.
- Git and a GitHub account.
- A Light Cloud account on the Starter plan or higher, for the database.
- A terminal with curl. On Windows, use PowerShell 7 and
curl.exe, which ships with Windows 10 and 11.
Step 1: Create the project
$ npx @nestjs/cli@latest new tutorial-nestjs-api --package-manager npm
$ cd tutorial-nestjs-api
$ npm install pg class-validator class-transformer
$ npm install -D @types/pgPS> npx @nestjs/cli@latest new tutorial-nestjs-api --package-manager npm
PS> cd tutorial-nestjs-api
PS> npm install pg class-validator class-transformer
PS> npm install -D @types/pgThe CLI creates the project, installs the packages and sets up a Git repository. Keep its .gitignore: it keeps node_modules and dist out of the repository.
Delete the example files you will not use: src/app.controller.ts, src/app.service.ts, src/app.controller.spec.ts and test/app.e2e-spec.ts.
Step 2: Start the compiled app
Open package.json and change one script:
"start": "node dist/main",
Light Cloud builds the project once with npm run build, then starts every instance with npm start. The starter's start is nest start, which compiles the whole project again before it runs. I measured both from the logs, from "Starting new instance" to "Nest application successfully started":
start script | Instance start to ready |
|---|---|
nest start | 17.2 s |
node dist/main | 5.4 s |
With Min instances at 0, that wait is what the first visitor after a quiet period feels. For local development use npm run start:dev, which still watches and recompiles.
Step 3: Connect to PostgreSQL
A small database module with one pool for the whole app:
import { Injectable, Logger, OnModuleDestroy, OnModuleInit } from '@nestjs/common';
import pg from 'pg';

@Injectable()
export class DatabaseService implements OnModuleInit, OnModuleDestroy {
  private readonly logger = new Logger(DatabaseService.name);

  // One small pool per instance. Light Cloud may run several instances,
  // so keep this low on a shared Dev database (10 connections in total).
  readonly pool = new pg.Pool({
    connectionString: process.env.DATABASE_URL,
    max: Number(process.env.DB_POOL_MAX ?? 3),
  });

  async onModuleInit() {
    await this.pool.query(`
      CREATE TABLE IF NOT EXISTS notes (
        id SERIAL PRIMARY KEY,
        text TEXT NOT NULL,
        created_at TIMESTAMPTZ NOT NULL DEFAULT now()
      )`);
    this.logger.log('connected to PostgreSQL, notes table ready');
  }

  async onModuleDestroy() {
    await this.pool.end();
  }
}
import { Global, Module } from '@nestjs/common';
import { DatabaseService } from './database.service.js';

@Global()
@Module({
  providers: [DatabaseService],
  exports: [DatabaseService],
})
export class DatabaseModule {}
The pool size matters more than it looks. Every running instance opens its own pool, and Light Cloud adds instances under load. A Dev database allows 10 connections per user, so a pool of 3 leaves room for three instances and your own tools. CREATE TABLE IF NOT EXISTS keeps this example short; a real project uses migrations.
Step 4: Add the routes
The request body is a class, so the validation pipe can check it:
import { IsNotEmpty, IsString, MaxLength } from 'class-validator';

export class CreateNoteDto {
  @IsString()
  @IsNotEmpty()
  @MaxLength(500)
  text!: string;
}
import { Body, Controller, Get, NotFoundException, Param, ParseIntPipe, Post } from '@nestjs/common';
import { DatabaseService } from '../database/database.service.js';
import { CreateNoteDto } from './create-note.dto.js';

@Controller('notes')
export class NotesController {
  constructor(private readonly db: DatabaseService) {}

  @Get()
  async list() {
    const { rows } = await this.db.pool.query(
      'SELECT id, text, created_at FROM notes ORDER BY id DESC LIMIT 50',
    );
    return rows;
  }

  @Get(':id')
  async get(@Param('id', ParseIntPipe) id: number) {
    const { rows } = await this.db.pool.query(
      'SELECT id, text, created_at FROM notes WHERE id = $1',
      [id],
    );
    if (rows.length === 0) throw new NotFoundException('Note not found');
    return rows[0];
  }

  @Post()
  async create(@Body() note: CreateNoteDto) {
    const { rows } = await this.db.pool.query(
      'INSERT INTO notes (text) VALUES ($1) RETURNING id, text, created_at',
      [note.text],
    );
    return rows[0];
  }
}
A health check that asks the database, not just the process:
import { Controller, Get } from '@nestjs/common';
import { DatabaseService } from './database/database.service.js';

@Controller('health')
export class HealthController {
  constructor(private readonly db: DatabaseService) {}

  // Checks the database too, so a broken DATABASE_URL shows up here.
  @Get()
  async check() {
    await this.db.pool.query('SELECT 1');
    return { status: 'ok', database: 'ok' };
  }
}
Wire it together, and turn on validation for every request:
import { Module } from '@nestjs/common';
import { DatabaseModule } from './database/database.module.js';
import { HealthController } from './health.controller.js';
import { NotesController } from './notes/notes.controller.js';

@Module({
  imports: [DatabaseModule],
  controllers: [NotesController, HealthController],
})
export class AppModule {}
import { ValidationPipe } from '@nestjs/common';
import { NestFactory } from '@nestjs/core';
import { AppModule } from './app.module.js';

async function bootstrap() {
  const app = await NestFactory.create(AppModule);
  // Rejects request bodies that do not match the DTO classes.
  app.useGlobalPipes(new ValidationPipe({ whitelist: true, forbidNonWhitelisted: true }));
  // Light Cloud passes the port in PORT; 3000 is for your own machine.
  await app.listen(process.env.PORT ?? 3000);
}
await bootstrap();
Step 5: Create the database
- In the Light Cloud console, click New..., New Database, PostgreSQL.
- Name it, keep Size at Dev, and click Create database. It is ready in a few seconds.
- Open the Credentials tab and click Copy under Connection String.
The Django guide shows these screens step by step.
The Node.js pg driver needs an ending on the string to use the encrypted connection the database requires: ?sslmode=require&uselibpqcompat=true.
Step 6: Run it against the database
$ export DATABASE_URL='postgresql://u_******:********@nest-notes-db-yourworkspace.db.light-cloud.io:5432/db******?sslmode=require&uselibpqcompat=true'
$ npm run build
$ npm start
[Nest] 66094  - 25.09.2026, 13:34:54     LOG [NestFactory] Starting Nest application...
[Nest] 66094  - 25.09.2026, 13:34:55     LOG [DatabaseService] connected to PostgreSQL, notes table ready
[Nest] 66094 - 25.09.2026, 13:34:55 LOG [NestApplication] Nest application successfully started +1msPS> $env:DATABASE_URL = 'postgresql://u_******:********@nest-notes-db-yourworkspace.db.light-cloud.io:5432/db******?sslmode=require&uselibpqcompat=true'
PS> npm run build
PS> npm start
[Nest] 66094 - 25.09.2026, 13:34:54 LOG [NestFactory] Starting Nest application...
[Nest] 66094 - 25.09.2026, 13:34:55 LOG [DatabaseService] connected to PostgreSQL, notes table ready
[Nest] 66094 - 25.09.2026, 13:34:55 LOG [NestApplication] Nest application successfully started +1msOutput is trimmed; Nest also lists every route it maps. The date format follows your computer's language settings. Your real connection string goes where the stars are. From a second terminal:
$ curl http://localhost:3000/health
{"status":"ok","database":"ok"}
$ curl -X POST http://localhost:3000/notes -H "content-type: application/json" -d '{"text":"Deploy the NestJS API"}'
{"id":1,"text":"Deploy the NestJS API","created_at":"2026-09-25T11:34:55.683Z"}
$ curl -X POST http://localhost:3000/notes -H "content-type: application/json" -d '{"text":"hi","done":true}'
{"message":["property done should not exist"],"error":"Bad Request","statusCode":400}PS> curl.exe http://localhost:3000/health
{"status":"ok","database":"ok"}
PS> curl.exe -X POST http://localhost:3000/notes -H "content-type: application/json" -d '{"text":"Deploy the NestJS API"}'
{"id":1,"text":"Deploy the NestJS API","created_at":"2026-09-25T11:34:55.683Z"}
PS> curl.exe -X POST http://localhost:3000/notes -H "content-type: application/json" -d '{"text":"hi","done":true}'
{"message":["property done should not exist"],"error":"Bad Request","statusCode":400}The last request shows the validation pipe at work: forbidNonWhitelisted rejects fields the DTO does not declare. Stop the app with Ctrl+C.
Step 7: Push and deploy
Commit the project and create the GitHub repository:
$ git add -A
$ git commit -m "NestJS notes API with PostgreSQL"
# Create an empty repository named tutorial-nestjs-api on github.com/new first.
$ git remote add origin https://github.com/YOUR-USERNAME/tutorial-nestjs-api.git
$ git push -u origin main
To https://github.com/YOUR-USERNAME/tutorial-nestjs-api.git
 * [new branch]      main -> main
branch 'main' set up to track 'origin/main'.PS> git add -A
PS> git commit -m "NestJS notes API with PostgreSQL"
# Create an empty repository named tutorial-nestjs-api on github.com/new first.
PS> git remote add origin https://github.com/YOUR-USERNAME/tutorial-nestjs-api.git
PS> git push -u origin main
To https://github.com/YOUR-USERNAME/tutorial-nestjs-api.git
* [new branch] main -> main
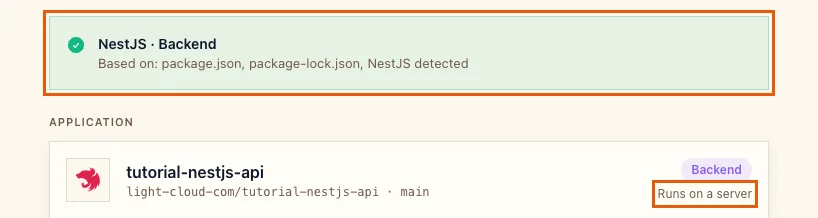
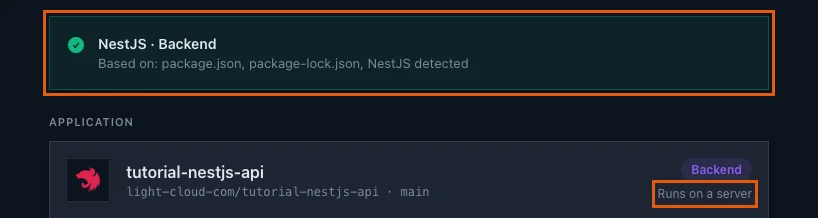
branch 'main' set up to track 'origin/main'.- In the console, click New..., Deploy from GitHub, and pick
tutorial-nestjs-api. Light Cloud shows NestJS / Backend and Runs on a server:
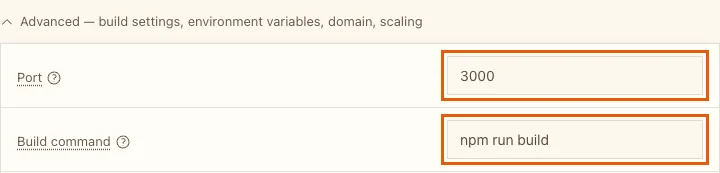
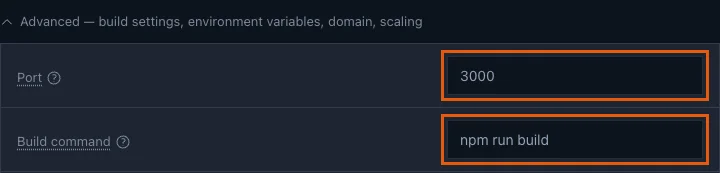
- Under Advanced, Port is
3000and Build command isnpm run build. Nothing to change.
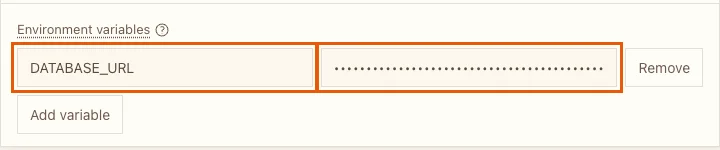
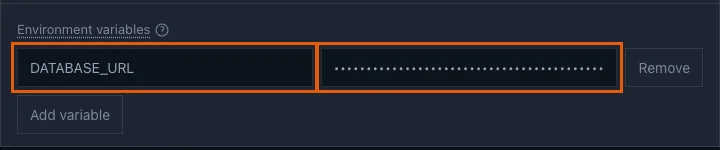
- Under Environment variables, add
DATABASE_URLwith the connection string and its?sslmode=require&uselibpqcompat=trueending:
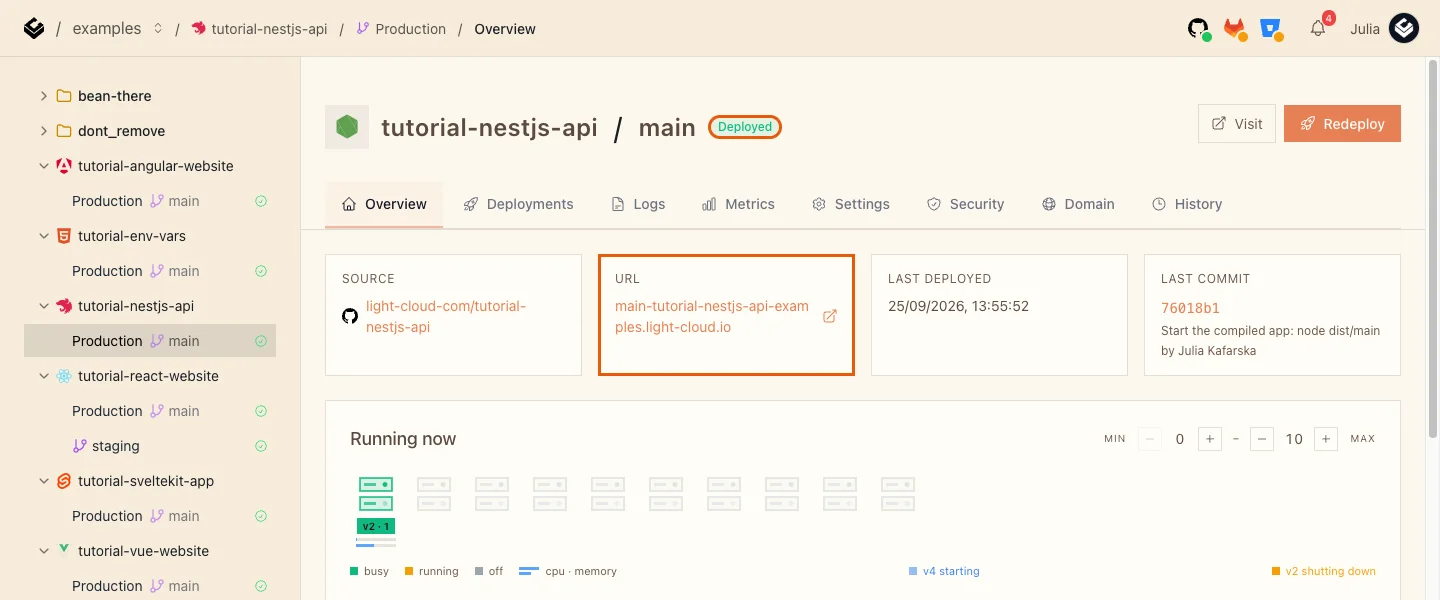
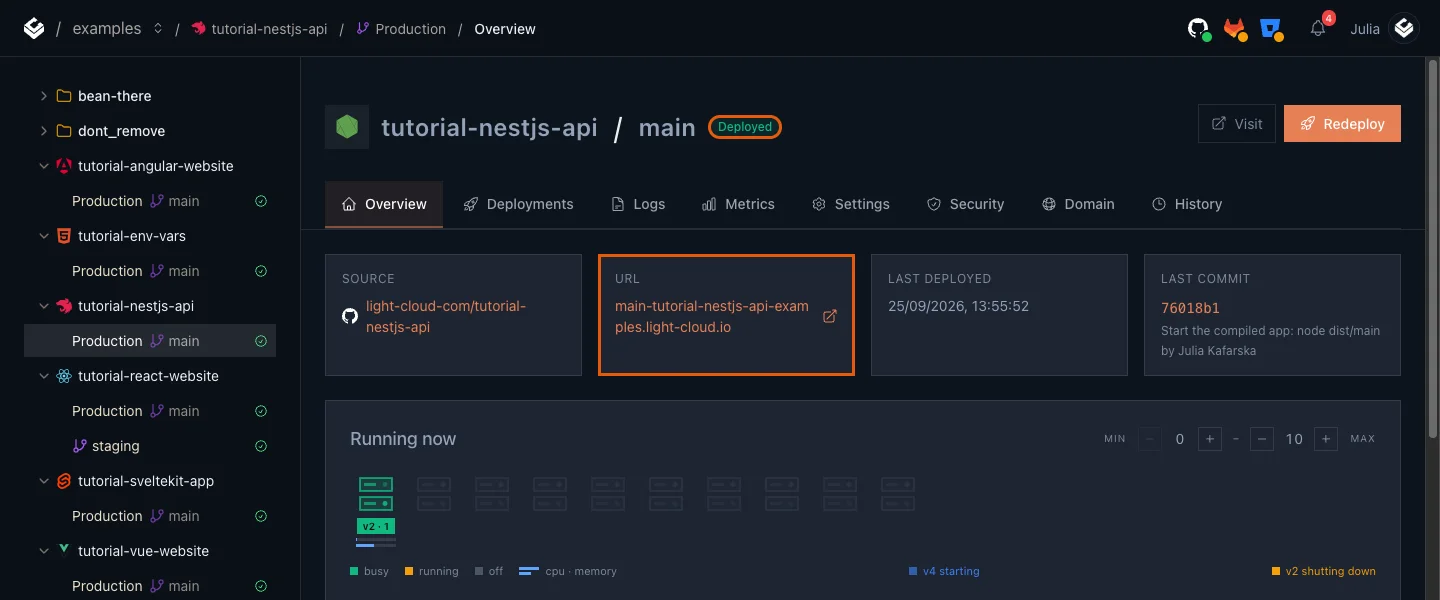
- Click Deploy and wait for Deployed; about two minutes for the first build, which installs and compiles everything.
Step 8: Use the live API
$ curl https://main-tutorial-nestjs-api-yourworkspace.light-cloud.io/health
{"status":"ok","database":"ok"}
$ curl -X POST https://main-tutorial-nestjs-api-yourworkspace.light-cloud.io/notes -H "content-type: application/json" -d '{"text":"Deployed from GitHub"}'
{"id":2,"text":"Deployed from GitHub","created_at":"2026-09-25T11:56:22.139Z"}
$ curl https://main-tutorial-nestjs-api-yourworkspace.light-cloud.io/notes
[{"id":2,"text":"Deployed from GitHub","created_at":"2026-09-25T11:56:22.139Z"},{"id":1,"text":"Deploy the NestJS API","created_at":"2026-09-25T11:34:55.683Z"}]PS> curl.exe https://main-tutorial-nestjs-api-yourworkspace.light-cloud.io/health
{"status":"ok","database":"ok"}
PS> curl.exe -X POST https://main-tutorial-nestjs-api-yourworkspace.light-cloud.io/notes -H "content-type: application/json" -d '{"text":"Deployed from GitHub"}'
{"id":2,"text":"Deployed from GitHub","created_at":"2026-09-25T11:56:22.139Z"}
PS> curl.exe https://main-tutorial-nestjs-api-yourworkspace.light-cloud.io/notes
[{"id":2,"text":"Deployed from GitHub","created_at":"2026-09-25T11:56:22.139Z"},{"id":1,"text":"Deploy the NestJS API","created_at":"2026-09-25T11:34:55.683Z"}]The note from your laptop is there too: both use the same database.
Troubleshooting
npm ci fails: "Missing: typescript@... from lock file"
The build's npm reads your package-lock.json differently from the npm that wrote it. Light Cloud builds on Node 24 (npm 11) by default; if you pinned an older Node in .nvmrc or engines, regenerate the lockfile with that same version, or pin the version you develop with.
EBADENGINE when creating the project
npm error notsup Required: {"node":"^22.22.3 || ^24.15.0 || >=26.0.0", ...}
The NestJS CLI 12 needs a newer Node.js than you have. Install Node.js 24 from nodejs.org and run the command again.
/health answers 500, or the app will not start
Check DATABASE_URL: it must end with ?sslmode=require&uselibpqcompat=true for the pg driver. The Logs tab shows the error from connected to PostgreSQL onward.
More tutorials


Django + PostgreSQL on Light Cloud: Migrations, Static Files and a Live Admin
Deploy Django 6 with PostgreSQL on Light Cloud without a Dockerfile: settings from environment variables, migrations from your laptop, static files with WhiteNoise, and a working admin behind HTTPS.
 Julia
Julia

Deploy a SvelteKit Site as Static Files: adapter-static and Prerendering
Deploy a SvelteKit site with adapter-static to Light Cloud: fix the Encountered dynamic routes error with export const prerender = true, and get real HTML pages served from the edge, deep links included.
Julia

How to Deploy an Angular App on Light Cloud, Deep Links Included
Deploy an Angular 22 app made with the Angular CLI to Light Cloud: the dist/<project>/browser output folder is detected automatically, Angular Router deep links work, and every git push redeploys.
Julia